
Hyper light drifter is a delightful yet punishing action RPG developed by Heart Machine which debuted back in 2016. Since its release, fans have not been able to get enough of the games incredibly beautiful pixel art design and high action “The Legend of Zelda on crack” style of gameplay. If you’re playing through Hyper Light Drifter right now and find yourself having a tough time with some of the bosses, don’t worry, we’re here to help. This walkthrough is solely focused on beating the toughest baddies in the game so you can continue to make progress and experience the greatness that is Hyper Light Drifter. Without further ado, here’s our boss guide and the best strategies for beating all the bosses in Hyper Light Drifter.
The Archer – Boss

- 45 hp
- Location – Barren Hills (South Zone)
- 3 gearbits
Attacks –
Arrow shot
- This attack does 1 damage per arrow and can slow your character down. If you are standing still, you are surely going to get hit with this attack. This attack can be defended if you have the “Sword Deflection” sword ability at the time of this battle.
Triple shot
- The Archers triple shot can be a nasty attack to get caught in as it does 1 damage/arrow (3 damage). When you are at a distance from the Archer he tends to repeatedly fire this attack, so it’s best to stay close. This attack can also be deflected using the “Sword Deflection” ability.
Volley of Mines
- Probably one of the most vicious attacks if you are caught in it. The Archers volley of mines rain down 4 mines from the sky into random areas around the Drifter and do 2 damage per explosion. The mines can be triggered by dashing over them or with the Roly Polies bomb weapon.
How to beat The Archer
The Archer is one of the easier bosses in the game as his attack patterns are pretty predictable. One of the main exploits that this boss has is when he is using his Volley of Mines attack. During this attack, the Archer will point his bow skyward and begin firing. During this time he is completely stationary, allowing you get in some serious attacks. Another great strategy for defeating the Archer is by dashing around the screen and trying to stay in lock step with his movements. Doing so will allow you to continuously attack him and avoid his triple shot ability. The third and probably most effective way to kill the Archer is by allowing him to fill the screen with mines. If you are skilled enough to avoid them using your dash ability, then you can be rewarded with a series of explosion chains which will cause the Archer to take a TON of damage. Though this is also the most risky of the methods, using his own weapons against him is best and does a lot of damage in a really short period of time if executed properly.

The Emperor (Toad King) – Boss

- 50 hp
- Location – Lake (East Zone)
- Reward – 3 gearbits & shotgun
Attacks –
Flame Jar Toss
- The Emperors (Toad King) flame jar toss ability deals 2 damage per jar to the Drifter and is his opening attack when the fight begins. These are randomly thrown in the player’s area and are best avoided with the dash ability.
Ground Pound
- The Emperors (Toad King) ground pound attack is a close range one that does 2 damage per attack. This is an area of effect attack where The Emperor (Toad King) will smash the ground with his might fists which is quite painful and slows you down.
Plant Beastling Spew
- The Emperor (Toad King) will also spit out two disgusting plant beastlings from his mouth that explode when they’re killed. These can be used against The Emperor (Toad King) as they can deal damage to him upon explosion. He will also spew out 3 of them when brought down to lower health and even become stunned when hurt by them, allowing you an opportune time to get some attacks in.
The Emperor (Toad King) Leap
- This attack involves the Emperor (Toad King) jumping on top of the player and does 2 damage. He will jump about 3 times and then pause for a moment allowing you to get a few attacks in.
How to beat The Emperor (Toad King)
One of the main attacks The Emperor (Toad King) will launch at you is the Flame Jars. Avoiding these bombs early on with your dash ability is key to saving health during the battle. This also opens up a great opportunity to do some early damage to him. During the Emperors jumping attack it is best to dash away and slash at him from a side angle. Once he hits the ground and is stunned for a few seconds, get a few repeated slashes in or use one of your special abilities to maximize damage. The main exploit with this boss however is to stun lock him by using his flame jars against him. Working to get in 1-2 attacks, dodging, and rinsing and repeat that same strategy until the Emperor is defeated. You fight the Emperor early on and is one of the easier bosses in the game.
The Hierophant – Boss

- 50 hp
- Location – Mountains (North Zone)
- Reward – 3 gearbits and rifle.
Attacks –
Vortex Trail
- The Hierophant’s opens with his vortex trail attack which deals 2 damage to the Drifter. Fires a trail of detonating tiles which follow the player’s movements. This attack gets more intense when he is brought down to lower health. This attack is also coupled with the Cross Vortex to really piss you off.
Cross Vortex
- Does 2 damage to the Drifter and detonates the tiles that you are standing on. These attack patterns tend to be in an X or + shape, giving you little time to react with your dash ability.
Striped Vortex
- Does 2 damage. The Hierophant fires a wave of exploding tiles which both cross the room vertically and horizontally. This attack becomes exploitable as the enemy is whittled down to lower health ranges.
Vulture Call
- The Hierophant summons 4 winged creatures to distract you while he continues the assault.
How to beat The Hierophant
Defeating this boss tends to be a little of a slow burn. It is important to understand that taking your time on The Hierophant is the main strategy for success. Evading his vortex attacks and using the shotgun at close range can be very effective (up to 5 damage). The best way to defeat him is to continuously take one or two close range attacks, while preparing to avoid his vortex, then rinsing and repeating. If possible, getting some rounds off from long range can be helpful in taking his health down a little bit from afar. Keeping an eye on your enemy, instead of the Drifter is important here. His vortex attacks are quick and randomized, so it’s hard to know what’s coming next without keeping a close eye on him. Doing so is crucial and helps to keep the damage flowing while his vortex continues to pummel you.
The Summoner – Mini Boss

- 40 hp
- Location – Barren Hills (South Zone)
- Reward – 3 gearbits
Attacks –
Node Summon
- When the battle begins the Summoner will deploy 5 nodes around itself that will burst-fire projectiles. The nodes can be destroyed and projectiles cannot be deflected with the Sword Delection ability.
Node Command
- The Summoner opens its chest activating nodes to replace any of the ones you have already destroyed. Then the nodes fire like crazy at you, volleying projectiles in a ton of directions for you to evade.
Tackle Charge
- The Summoner rushes into the Drifter causing 1 damage.
How to beat The Summoner
This guys annoying. Mainly because he continues to run away from you the entire battle and uses his nodes to attack for him. You are going to want to attack him differently during the different phases of his attacks. Once he deploys his nodes, its best to try and kill the majority of them quickly because they will make you life a living hell if you don’t. They are aggressive and are pretty much on you the entire battle. Use your dash ability to move towards them quickly then use the charged sword slash attack till you made quick work of them. Using the Roly Poly on these guys can be really fast and effective as well. Other than that, the Summoner get stun locked pretty frequently and can be dealt some serious damage while in this state. Wait for these moments and try to maximize the damage you put on him. Avoiding damage is tough with this boss, but is really important in defeating him.
The Hanged Man – Boss

- 50 hp
- Location – Crystal Forest (West Zone)
- Rewards – 3 gearbits, Zaliska, & 1 Key
Attacks –
Jumping Slashes
- This is the Hanged Mans opening attack and does 1-2 damage to the Drifter. 2 jump attacks are targeted directly to the player’s location, with a brief resting period. This attack is done 3 times in a row. After considerable damage is done to the Hanged Man, he performs 3 jumping strikes.
Crystal Shockwave
- A crystal spike attack that shoots outward dealing 2 damage to the Drifter.
Zaliska
- The Hanged Mans pistol weapon that does 2 damage with each shot. This attack can be deflected with the Sword Deflection power.
Summon Crystal Knight
- The Hanged Man summons one of the Crystal knights
How to beat The Hanged Man
The Hanged Man can be a challenging boss simply because of the variety of attacks he can throw at you. I recommend leading him towards one of the Crystal Knights early on in the fight. Doing this will cause him to kill his own resources and prevent him from using them later on. Evading his double and triple sword attacks with your dash ability is important. Once those end, quickly parry for 2 attacks, and dash away to avoid damage. Avoiding his crystal shockwave is easy, just keep your distance and allow his attack to finish. After that, get in close for 3-4 strikes on him. More than likely he will try and use Zaliksa against you. Just keep your distance and use your Sword Deflection ability to send the damage back his way. Repeat these steps until the Hanged Man is defeated.
The Reaper – Mini Boss

- 35 hp
- Location – Barren Hills (South Zone)
- Reward – 3 gearbits
Attacks –
Quick Swipe
- The Reaper will lunge towards the Drifter and perform a slash attack that deals 2 damage.
Throw Scythe
- The Reaper will throw his scythe from long range and like a boomerang returning to his control. The Scythe spins in a floating motion that leaves him stationary for a brief period. Does 2 damage to the Drifter.
Spinning Scythe
- Spins the scythe around itself doing 2 damage to the Drifter.
How to beat The Reaper
The best strategy for defeating The Reaper is to keep your distance. While his scythe attack has triggered, he will be vulnerable. Use long range weapons to get some quick damage on him during these resting periods. Once the scythe is returned to him is the best time to perform 1-2 sword strikes or 1 charge sword attack (4-5 damage). Continue to dash and move away from his scythe attacks and find your openings. Gradually bring his health down by repeating this process and you’ll find yourself with 3 gearbits as your reward.
The Sorcerer – Boss

- 50 hp
- Location – Barren Hills (South Zone)
- Reward – 3 gearbits
Attacks –
Fire Orb
- The sorcerer creates two fire orbs that float around him and fire towards the Drifter doing 2 damage per orb. The orbs can be deflected using Sword Deflection. After 50% of damage is dealt he summons 4 orbs.
Flying Charge
- The sorcerer performs a quick flying attack towards the Drifter doing 1 damage.
Area Manipulation
- Pausing for a moment to access some kind of holographic screen, the sorcerer is able to manipulate the tiles on the floor, removing them. This only occurs after 50% damage. Use Sword reflection and ranged weapons during this time.
How to beat The Sorcerer
Dodging is extremely important in this battle early on. Make sure to use the sword deflection ability to send his Fire Orbs back at him. This will help to keep his health moving down as you are dodging. If both orbs hit you, you could be looking at a really quick defeat depending on how much health you have going into this fight. Using the shotgun at close range can be a great way to take down some of the Sorcerers health before he separates the floor tiles. Keep deflecting his fire orbs back at him after the tiles have been removed and evade his other attacks for the win.
Judgement –
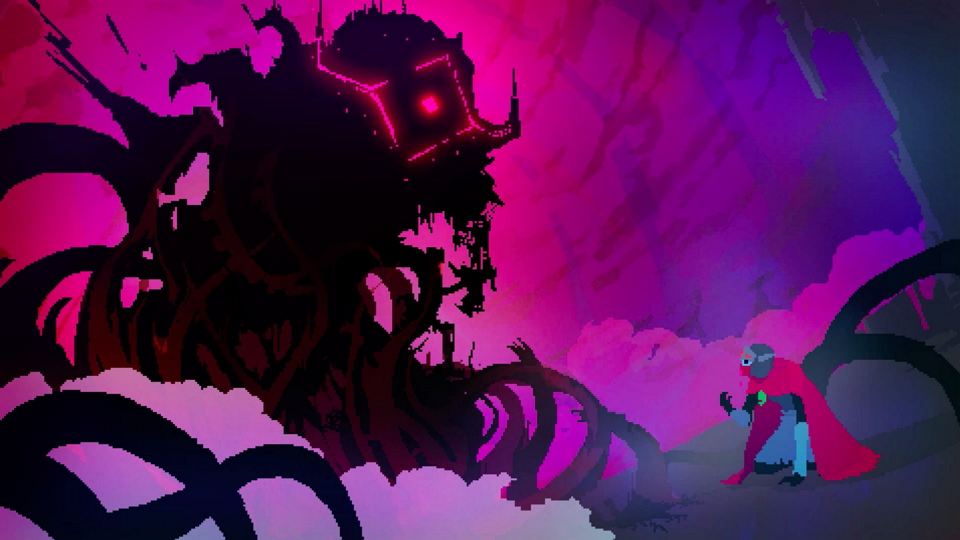
- 75 hp
- Location – Abyss (Central Tower)
Attacks –
Charge
- Judgement fly’s across the room and attacks the player doing 2 damage per charge. This is a crippling attack if you are hit by it. If you are hit by the first dash, you cannot avoid the second attack.
Bullet Barrage
- Judgement will move the closest corner of the room and begin firing a barrage of bullets towards the Drifter dealing 1 damage per bullet. This attack fires 4 times, once in every corner.
Hyper Laser
- This is Judgements most dangerous attack and occurs after every bullet barrage. Judgement fires a laser that starts from the wall closest to the Drifter and ends in the opposite corner of Judgement. As he begins to die, the speed of the laser increases. This attack does 2 damage per hit.
Arm Stab
- Judgement fires a few harpoon like projectiles around him. If you are hit you get knocked back and dealt 2 damage.
Light Explosion
- The screen goes black momentarily with 4 diamond shaped light boxes appear floating in mid-air. These boxes can and should be attacked. When the light returns to the screen the remaining boxes will trigger a massive explosion in an area of effect pattern which matches where they are floating on the tiles.
How to beat Judgement
Since this is clearly the most difficult boss of the game, having all of the necessary abilities unlocked will be super valuable in your success. Judgements attacks are relentless and making sure to continually dodge his patterns is crucial in avoiding damage. Since any and all attacks that come your way can almost instantly kill you, making sure to dodge frequently and get up close when possible for some quick strikes. He tends to float around a bit leaving himself open for a few attacks, but when he is moving, get the hell out of the way. Getting behind him after he performs his bullet barrage attack will allow for some quick damage and making sure that you are behind him for his Hyper laser attack will prevent you taking a ton of unnecessary damage. After he performs his light explosion attack he will be vulnerable for a few easy shots, then go right back into his charge attack. Be sure to avoid this be getting out of the way but not placing yourself to far away to get in some sword strikes. Mid way through the battle, make sure to heal with a med-kit just to put yourself at full health. Continue to avoid the charge, bullet barrage and hyper laser attacks and take this bitch down!
There you have it, you’ve defeated Judgement and lived to brag to your friends about how badass you are. Enjoy the ending to the game!
If you’re looking for more HLD then check out our post for the Top 5 Ways to Survive in Hyper Light Drifter.
Until next time!